Installing OS2borgerPC Kiosk (x64)
Note
This is the installation guide for our 24.04 and newer images. The installation guide for our older images can be found here.
Install OS2borgerPC Kiosk image
Get the most recent OS2borgerPC Kiosk image as provided by Magenta,
or build one yourself according to the instructions in the image
directory.
Copy the image to a USB and boot the target computer with it. One Windows program for this purpose is “Rufus”.
The image will work with UEFI boot, but legacy boot is also supported.
Image 3.1.0 and newer images support the option for automatic setup and registration and/or running scripts at the end of the installation. If you wish to make use of these options, it will be necessary to modify the USB before you boot the computer with it. This requires that the USB is writable. The program “Rufus” makes writable USB’s by default. The configuration of these options is described in the related sections. If you do not wish to make use of the options for automatic setup and registration and/or running scripts at the end of the installation, you can skip to the section “The installation procedure”.
Configuring automatic setup and registration (optional)
If you are using image 3.1.0 or a newer image, the root of the file system on the USB will contain a file named “automatic_registration_config”. If you write the site UID and computer name in this file, the computer will use the listed values to perform automatic setup and registration after the installation procedure. When using automatic setup and registration, the computer will always install the Wi-Fi drivers mentioned in the section “Getting internet access”.
The final setup and automatic registration both require an internet connection. If the file “automatic_registration_config” has been filled out, but the computer does not have an internet connection after the installation procedure, the automatic setup will fail, which also prevents the computer from performing automatic registration. Wi-Fi drivers will still be installed. The computer will then instead ask if you wish to start the built-in installation wizard. If the automatic registration itself fails, because the site UID or computer name is invalid, a firewall blocks the registration or the network is unstable, the computer will instead start the manual registration process. It will be necessary to restart the installation if you wish to repeat the automatic registration.
The computer name for automatic registration will by default be “serial_number”, which makes the computer attempt to read its serial number and use that as the name for the automatic registration. The computer can only read its serial number if the manufacturer has correctly listed it in a way that allows the operating system to access it. This is the case for the vast majority of computer models, but not for all computer models. If the computer can’t read its serial number, automatic registration with serial number as the name will fail.
The file “automatic_registration_config” has the following default content:
site_uid:
pc_name:serial_number
If the content of “automatic_registration_config” is not changed from the default, the computer will not perform automatic setup and registration.
The following is an example of the content of an “automatic_registration_config” file that would cause the computer to perform automatic setup and registration with the site that has site UID “test-site” with the computer’s serial number as the name:
site_uid:test-site
pc_name:serial_number
The following is an example of the content of an “automatic_registration_config” file that would cause the computer to perform automatic setup and registration with the site that has site UID “test-site” with the computer name “test-pc”:
site_uid:test-site
pc_name:test-pc
Note
After automatic registration, it is still necessary to activate the computer on the admin portal before you can e.g. run scripts on it.
Running scripts at the end of the installation (optional)
If you are using image 3.1.0 or a newer image, the root of the file system on the USB will contain a directory named “custom_scripts”. All .sh and .py scripts, that are placed in this directory, will automatically be run at the end of the installation procedure. If one of these scripts requires parameters, the parameters must be included in the script file itself, as the scripts in the directory are run without any external parameters. If a script requires a file parameter, that file can also be placed in the directory “custom_scripts”, and the script can refer to it by utilizing the fact that they are both located in the same directory.
Caution
If a script in the directory “custom_scripts” fails, the installation itself might also fail.
The installation procedure
The installation procedure will not ask a lot of questions. First of all, it will ask you to specify the disk you will install on, as shown below:
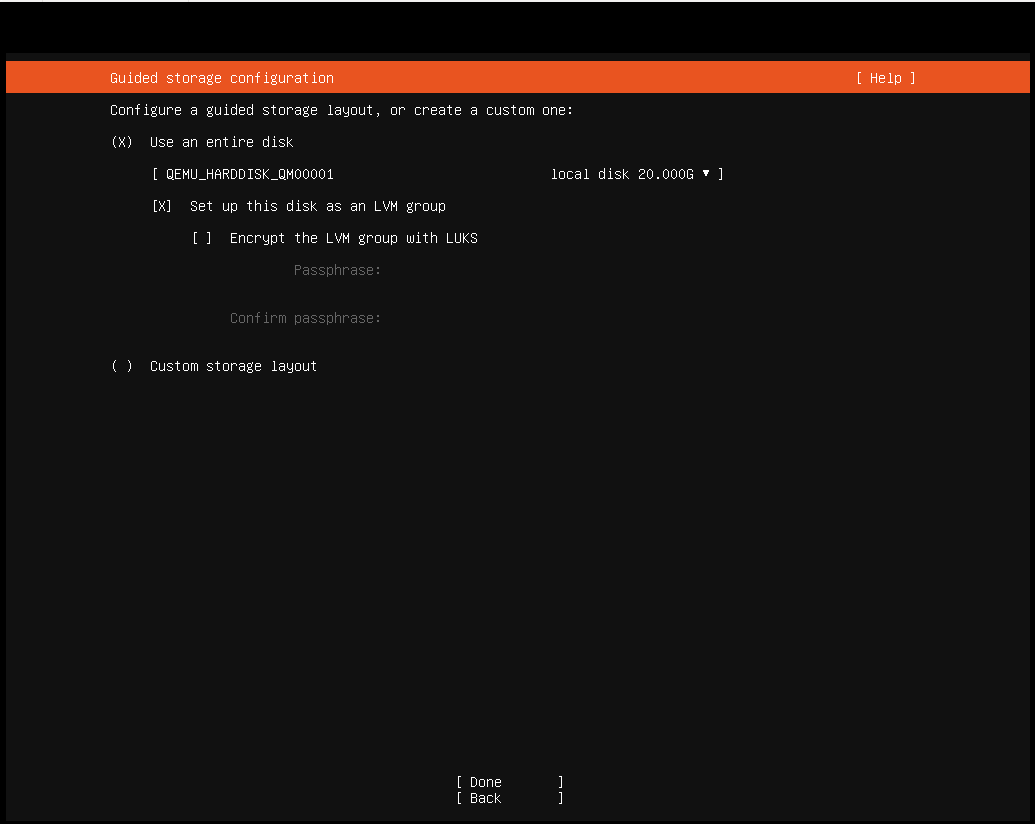
If you’re installing on a normal setup with only one hard disk attached, the defaults will be fine - in that case, hit TAB until you reach “Done” and hit ENTER. Otherwise, specify disk and partitions according to your needs.
Hint
You can optionally activate disk encryption by checking the option “Encrypt the LVM group with LUKS” (hit TAB or use the arrow keys to highlight the relevant line then press ENTER) and then entering a passphrase. If you activate disk encryption, it will be necessary to enter the chosen passphrase during every startup of the computer. Entering the passphrase will require a physical keyboard.
As the installation will destroy all data on the disk in question, you will now be asked to “Confirm destructive action”. To proceed, select “Continue”.
Caution
This step will destroy all data on the disk you install on.
The system will now install - this will take some time.
At the end of the installation procedure, the computer will run any .sh or .py scripts added to the directory “custom_scripts”.
Remove the installation media and reboot.
Note
If you chose to activate disk encryption, the computer will ask for the passphrase shortly after the reboot.
Setup after the installation procedure
The following sections describe the process for manual setup and registration after the installation procedure. If you are using automatic setup and registration, you can thus skip directly to the section on “Post registration configuration” in Configuration and advanced topics unless the automatic setup or registration fails. If automatic setup and registration succeeds, the computer will simply show a login prompt after the automatic registration.
Manual setup after the installation procedure
The computer will now ask if you wish to start the built-in installation wizard.
The screen may contain output related to the upstart process, but this can be ignored.
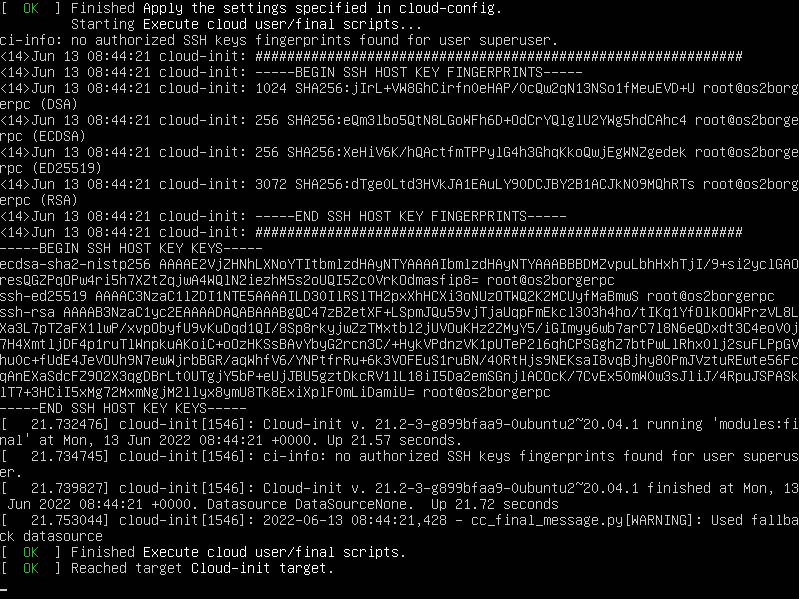
Simply press ENTER if you wish to start the installation wizard. If you do not wish to use the wizard, type n before pressing ENTER. If you exit the wizard, you will already be logged in as superuser, but it will be necessary to run the commands corresponding to each step of the wizard in order to complete the installation. You can restart the wizard by running the command:
exit
Getting internet access
First, the wizard will ask if you wish to install Wi-Fi drivers. This is necessary if you wish to set up a wireless network or configure a static IP. They are not installed by default. You don’t need a network connection to install the Wi-Fi drivers.
If the computer is connected with an Ethernet cable and a DHCP-enabled network, and you do not wish to configure a static IP, the Wi-Fi drivers are not necessary. However, if the computer will need to be connected to a wireless network in the future, we recommend installing the Wi-Fi drivers anyway.
Note
If you can’t get internet access while using an Ethernet cable and a DHCP-enabled network, it might help to switch to the HWE kernel. See Configuration and advanced topics.
Simply press ENTER to begin installing the Wi-Fi drivers. Type n before pressing ENTER if you do not wish to install the Wi-Fi drivers.
You can install the Wi-Fi drivers without the wizard by running the command:
sudo wifi_setup
Note
If what you want to connect to is a hidden SSID, see Configuration and advanced topics.
If you choose to install Wi-Fi drivers, the wizard will ask if you want to manually configure Wi-Fi after the drivers have been installed. If you choose not to install Wi-Fi drivers, this step will be skipped.
Simply press ENTER to open nmtui, which is used to connect to a wireless network
or configure a static IP. Type n before pressing ENTER to skip manual Wi-Fi
configuration.
You can open nmtui without the wizard by running the command:
nmtui
You navigate within nmtui via the arrow keys, ENTER and ESC.
To connect to a new network choose “Activate a connection” in the menu. If everything works as it should and the computer has a wireless card, you will see a list of wireless networks (if any exist, of course).
Note
If the computer can’t see any wireless networks even though one or more should exist, it might help to switch to the HWE kernel. See Configuration and advanced topics.
Once you’ve found and selected the desired Wi-Fi from the list, you will be prompted for its password.
If you need to connect to a WPA2 Enterprise network, it may not work
from nmtui. In this case we suggest, if possible, that the machine
is installed over another Wi-Fi or a LAN, and subsequently moved
to the WPA2 Enterprise Wi-Fi. We have a script in the admin system for
this purpose.
If you’re already connected, e.g. through Ethernet, choose “Edit a Connection”. You can now setup static IP, etc.
Note
In some cases, the wireless cards will not work properly unless the computer is connected through Ethernet during installation. We recommend that you install with an Internet-enabled Ethernet connection, though in some cases it will also work without it - it depends on your specific wireless card.
Once you’re connected to the network and exit nmtui, or if you skip manual
Wi-Fi configuration, the wizard will start the final setup. If you exit nmtui
without being connected to the network, the wizard will ask if you wish to retry
manual Wi-Fi configuration.
Final setup and connecting to OS2borgerPC-admin (our admin system)
You can start the final setup without the wizard by running the command:
sudo os2borgerpc_kiosk_setup
The final setup will first install all dependencies for the OS2borgerPC client.
Note
This may take some time.
Finally, you’ll be prompted for information to register the machine with our admin system:
name: Give the computer any valid name you like.site: If hosted by us: Use the site UID we should’ve e-mailed you. If self-hosting or developing: Create a site, and specify its UID here.
The final setup is now complete.
Configuration and advanced topics
For the next steps, showing how to configure it to run OpenStream or Chromium, see: Configuration and advanced topics